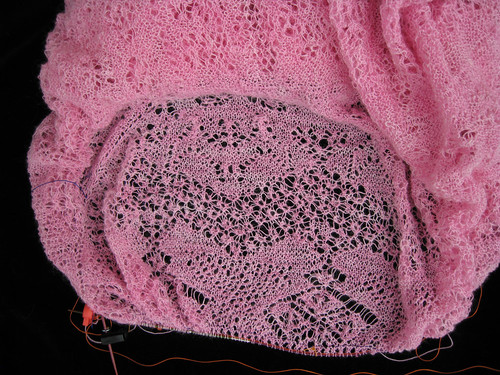
Tuesday, September 15, 2009

Current Knitting (and Spinning)


 King Bat Shawl

I slogged my way to the finish line of the shawl body a few days ago. As you might imagine, I am very tired of pink. I have miles of edging to knit on before the thing is completed, but I am putting it aside for a while to let my Pink Receptors recover from extended stimulation. Cindersall's reversal of the crown motif was masterful, and I think it looks better than the original.


Honeysuckle Shawl/Sweater
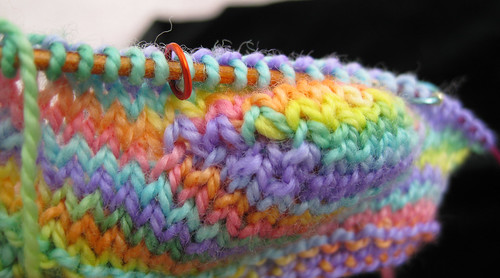
Having carefully placed the Bat shawl on the bottom of my UFO pile, I decided to treat myself with my rendition of the Honeysuckle shawl/sweater thing, which appeared in Issue #6 of The Knitter.

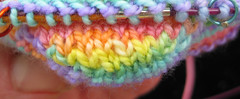
This design is beautiful--elegant, graceful, and feminine. I had to read the directions four times because I simply couldn't believe that the designer would actually take a round shawl and convert it to flat knitting. Thus, the reader is instructed to knit across the pattern row, turn, purl back, and then, when the piece is finished, sew up the back seam. Nah. I am knitting it in the round like a grown-up.

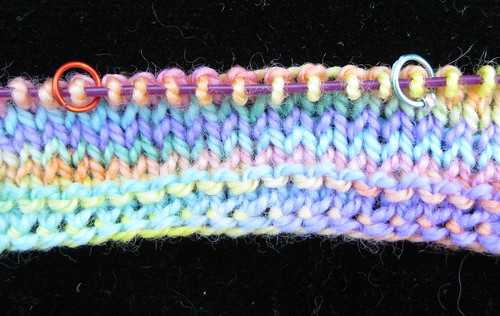
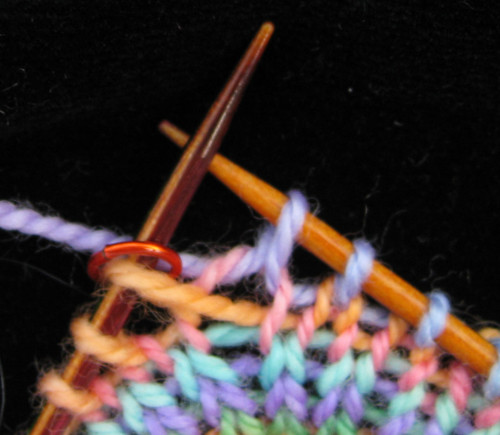
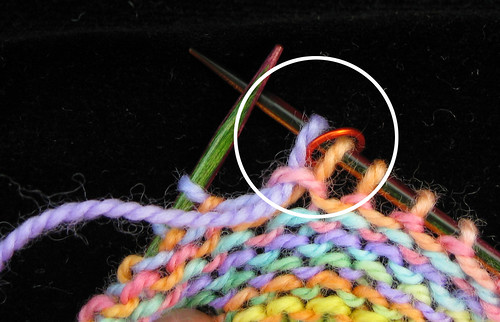
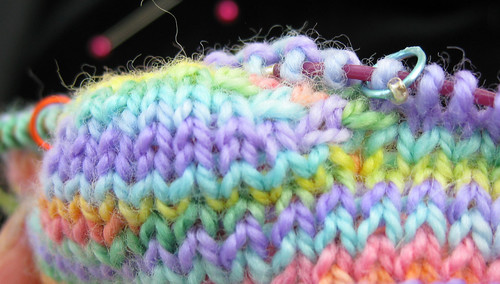
For the sleeves, the original design calls for casting off 40 stitches one one row and then casting on 40 stitches in the next row. The sleeves are knitted separately and then sewn into the gap. Why make an ugly seamline at the shoulder and force the knitter to do even more sewing? Instead, I will knit a contrasting piece of yarn over 40 stitches. When I am ready to do the sleeve, I will carefully undo the contrasting yarn, pick up the stitches around the armhole, and knit the sleeves from the top down to the wrist.

In an incredible display of foresight, I decided to bead only the sleeves and the front side of the sweater. I realized that if I beaded the entire thing, I would wear the sweater once, wonder why my back felt like llittle glass beads were digging into it, slap my forehead, and put the thing away forever.

I am using Hamanaka mohair/silk Parfait yarn and some pretty beads that have been languishing in the closet for a while. Harry finds the piece rather restful. Too restful. I have to shake him out of the thing every time I want to work on it.


Spinning
I love Corgi Hill batts. I love them to pieces. I want to make an entire room out of Corgi Hill batts and live there. While I am busy accumulating the raw materials for the Corgi Hill Extension, I actually spun some up. Here's a neat ball of Navajo-plied merino/silk:


It will probably become a scarf for Kyoko-san if Harry doesn't filch it and bury it in his stash drawer.

And here's what's currently on the spindle:

 
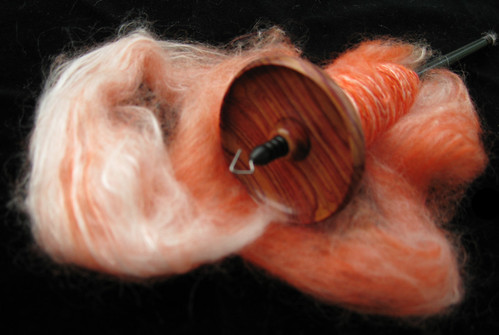
The lovely fluff is Corgi Hill merino/silk and the tulipwood/ebony spindle is from Spindlewoods. I have no idea what I will do with the finished yarn, but I am thinking it should be two-ply laceweight, which of course leads to wandering around my notebooks looking for an appropriate project.  Like I need another project...

Saturday, September 5, 2009

The Fleegle Symmetrical Short Row--No Wraps, No Holes, No Hassles

I've never been a fan of short rows, mainly because I've never been able to make them look pretty. I've tried all the techniques--yarn overs, Japanese, wrapped, unwrapped, rewrapped, and encroachment-- and frankly, they all look hideous. Or worse, one side looks nice and the other side looks hideous.

Every so often, I pick up my needles and fiddle around with short rows. But it wasn't until yesterday, as I was dozing in the car, that I came up with a new short row technique that actually looks attractive, is symmetrical, leaves no holes, and doesn't require wrapping or safety pins. Those familiar with the fleegle heel will find the concept similar. The only difference is that you are not spacing out the increases to make a gusset. You'll see what I mean when you work the sample (assuming, of course, that you have tried the fleegle heel).

If you want to try this out, I suggest you  cast on 20 stitches. Knit a few rows and place markers around the center 10 stitches, because it will be between these two markers that we shall build a little nose. Note that all slipped stitches are slipped purlwise.

Here's what your row looks like at the beginning:


Knit across the 10 stitches between the markers. Put your needle through the bump behind the 11th stitch...


...and knit through the loop. You now have 11 stitches between the markers.


Turn. Slip the first stitch, which is your "new" stitch, and give it a little tug to tighten it up (important!). Before you proceed, please look carefully at the two stitches on the right needle. They are a pair under a single bump and the pair straddles the marker. I call it "1 pair."


Now purl 10.

Put your needle through the bump in the front of the 11th stitch...


...and purl through it.


You now have 12 stitches between the markers. Notice that you have made another pair of stitches under a single bump straddling the marker.


Turn, slip then first stitch, give it a little tug to tighten it up, and knit 9.

Put your needle through the bump behind the next stitch and knit it. You now have 13 stitches between the markers, and two pairs.


Continue on...

Turn, slip the first stitch, purl 8.  Put your needle through the bump below the next stitch and purl it. 14 stitches are now between the markers and 2 pairs.

Turn, slip, knit 7. Pick up the bump in back and knit it (15 stitches between markers and 3 pairs).

Turn, slip the first stitch, purl 6. Pick up the bump in front of the stitch you just purled and purl it (16 stitches between markers and 3 pairs).

Turn, slip, knit 5. Pick up the bump in back and knit it (17stitches between markers and 4 pairs).
 
Turn, slip the first stitch, purl 4. Pick up the bump in front of the stitch you just purled and purl it (18 stitches between markers and 4 pairs).

Now we are ready for the second half of the short rows. The basic concept is that you will knit (or purl) one stitch further on each side by knitting (or purling) two stitches together. Do pull out the slack when knitting these. Otherwise, you'll have loose stitches that will make you sad.

Here is an annotated photo showing which stitches get knitted together.


Turn, slip the first stitch, knit 5, pull on the yarn to remove slack, knit 2 together.

Turn, slip 1, purl 6, purl 2 together or purl 2 together through back loops. I prefer the way P2tog looks, but you may like P2togtbl better.

Turn, slip the first stitch, pull on the yarn to remove slack, and knit 7. Note that the 7th stitch is the K2tog from the previous row. If you make a note of these decreases, you won't get confused as to how many stitches you should be knitting or purling plain. Knit 2 together.

Turn, slip 1, purl 8, P2tog.

Turn, slip the first stitch, knit 9. K2tog.

Turn, slip 1, purl 10, P2tog.

Turn, slip the first stitch, knit 11. K2tog. Do not turn. 

Knit to the end of the row.

Turn. Purl 12 across the center markers, P2tog.

And here's what the left side should look like:


And the right side:


And the front (sorry, it's hard to photograph a nose):


Given this basic technique, many modifications are possible. You can use a different increase (knit front and back, for example). And you can change the directions of your decreases. Experiment and see what works best for you. If you have an improvement, do let me know!