I love inventing ways to do things--the invention process is often so much more intriguing than actually knitting the object. Once I've worked out the principle, I find myself wishing for an apprentice who could just follow my notes so I don't actually have to knit the darn thing.
Alas, I have no apprentice (applications are being taken now!), so after figuring out how to work this sweet little sweater, I had to produce a finished object, otherwise nobody could figure out what I was babbling about.
What?
In this post, I will demonstrate the principles of sideways seamless construction, which can be applied to all sorts of useful and non-useful things--toys, hats, doorknob covers, whatever. Pithy directions follow all the picture stuff.
Why?
Sideways construction has several things to recommend it.
First of all, most people look, um, not so wonderful in horizontal stripes. But knitting a regulation sweater with vertical stripes is about as fun-filled as, say,sleeping on golf balls. Each stripe requires a different ball of yarn just waiting to tangle up with all the other balls of yarn dangling from the needle. If you forget to twist, you get a hole. Face it, you don't see a lot of striped intarsia sweaters. But knitting a vertically striped sweater sideways requires only that you change yarn color after each stripe. And you can decide on-the-fly just how wide you want the stripes to be.
Second, some types of yarn are inherently droopy--cotton and silk for example. Sideways construction can alleviate the tendency of these fibers to stretch and sag.
Thirdly, you can easily try on the sweater as you go along, as demonstrated by Larry in the accompanying picture essay.
And lastly, it's just fun to do things at a 90-degree angle. All sorts of interesting problems present themselves to be solved with incredible cleverness or brute force, depending on your attitude and and/or Clever Quotient.
So, onwards to the lesson.
How?
Here we have a perfectly normal little sleeve knitted in the round on two circular needles. Anyone who has knitted a tube will know how to do this. (If you don't, the Internet is full of information about this technique.) From this tiny acorn, we shall make a sweater grow.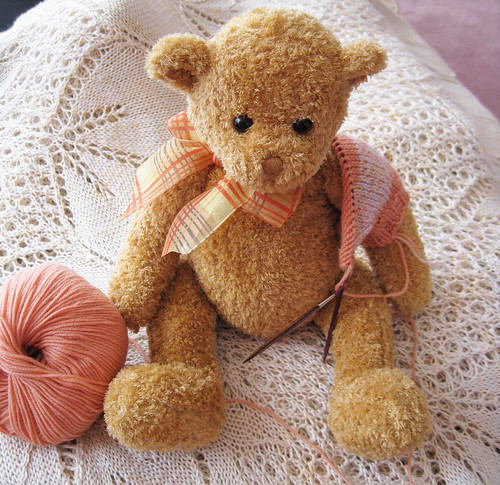
First, we cast on the stitches for the front and back using my beloved Turkish cast-on. This fancy and exotic name just means: Wrap the yarn around two needles--couldn't be simpler.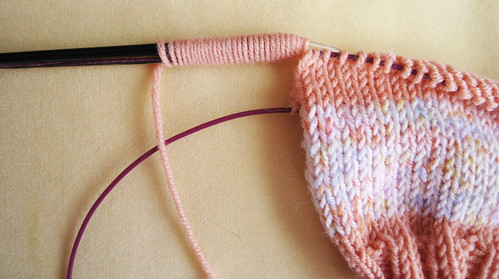
The yarn is at the bottom front of the sweater, so I turn the needles over so the knit (right side) of the garment is facing me and knit back. I am putting a moss stitch band at the bottom edge. Alternatively, you could knit the entire garment plain and pick up the stitches later for a ribbed bottom edge.
You have to be a bit careful here to pick up the correct needle to knit back. If you do it wrong, you'll find you will get up to the sleeve and suddenly, the purl size is facing you. Whoops--better start over.
The sleeve stitches are now shoulder stitches.
As I cruise over the shoulder, a lovely sight greets my eye, namely, all the back stitches just waiting for me to knit up.
And so I do. Now I am at the lower edge of the sweater back.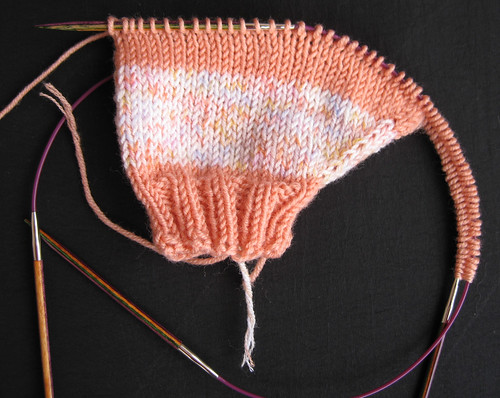
I turn, and purl back to the front again.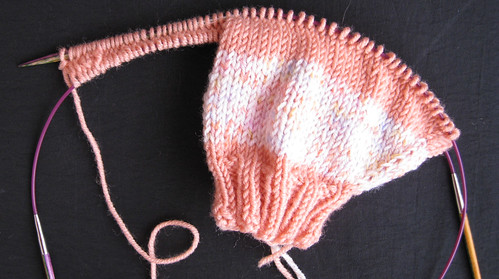
Basically, I am knitting a U-shaped object. The curve is the shoulder and the legs are the front and back sides. Here we are a bit further along.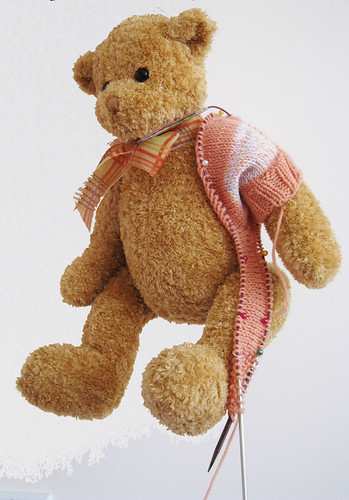
Continuing on, I finish the shoulder area. Here's a side view.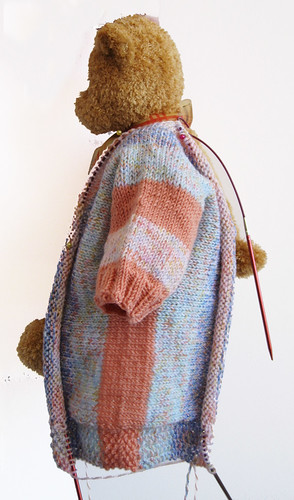
And then, the back and front must part ways for a while, because we do need a hole for the head. If you forget the hole, I suppose you could steek it, but that's way beyond my area of expertise. You are on your own if you decide to cut and sew.
For the neck area, instead of knitting back and forth over the entire garment, we shall knit the front back-and-forth and the back forth-and-back. Um. How about: The front and back are knitted separately to accommodate the neck area. The shapings are the same.
Once we have finished with the neck, the back and front have a joyous reunion at the shoulder.
When the second shoulder area is complete, I carefully isolate the sleeve stitches with markers because I tend to daydream and do stupid stuff like bind off the entire side, thus producing an inventive one-armed sweater. Do not ask me how I know this.
The yarn is at the bottom edge of the front. I turn the garment inside out and do a 3-needle bind-off up to the sleeve stitches.
And whipping out my trusty second circular, I finish off the second sleeve.
And finally, I pick up the neck stitches and do an inch of ribbing.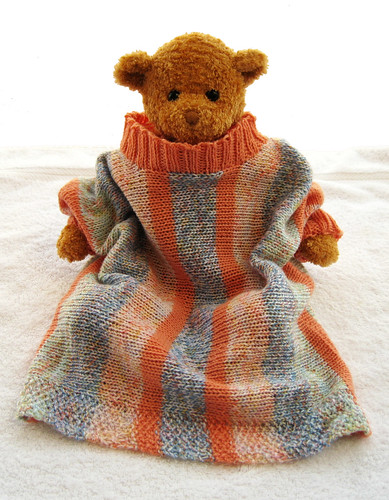
Here is the garment shown flat.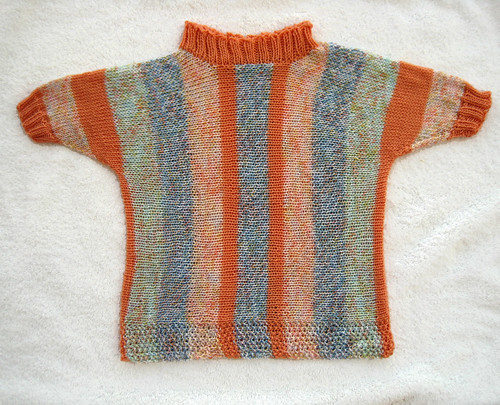
I used four colors of a weird yarn (Stampato Color Baby) that I found in a teeny yarn store somewhere. It's a nice 100% merino fingering weight and the garment needed about 300 yards with size 3 needles (size 2 for the ribbing). I changed colors every 12 rows, but if I were to knit a second sweater, I would use self-striping sock yarn, because weaving in all those ends were way too much trouble for a lazy knitter like me.
Pithy Directions
Using smaller needles, cast on 36 stitches and join in a circle.
Rib for 9 rounds (K2P2).
Knit 1 row.
Increase 4 stitches evenly across the next row. (40 stitches)
Change to larger needles and knit 1 row.
Increase 1 stitch at the beginning and end of every other round 9x. That is, increase 18 stitches. (58 stitches).
Cast on 39 stitches by wrapping the yarn around the needles 39 times. The 9 stitches at the bottom edges in the sample are worked in moss stitch. Alternatively, cast on 30 stitches and when you are finished with the rest of the sweater, pick up 96 stitches across the bottom and knit 9 rows of K2P2 ribbing.
Work 36 rows for the shoulder area.
Split for neck (front and back are worked identically):
Decrease 1 stitch at the neck edge 6x.
Knit 24 rows.
Increase 1 stitch at the neck edge 6x.
Join front and back by knitting without turning at the neck.
Knit 36 rows for the other shoulder.
Place markers for the sleeve--the easiest way is to count 39 stitches from the bottom edges of the front and back.
Turn the garment inside out and do a 3-needle bindoff of the body stitches. Or graft the 39 stitches together, if you like.
Place the 58 sleeve stitches on 2 circulars and decrease 1 stitch each side every other row 9x. (40 stitches)
Knit 1 row.
Decrease 4 stitches evenly across the next row. (36 stitches)
Change to smaller needles and knit 1 row.
Rib for 9 rounds (K2P2).
Pick up 96 stitches around the neck area with the smaller needles and rib for 9 rows.
Bind off really loosely--babys' heads are larger than you think they are.
Thursday, February 28, 2008
A Normality Sweater
Friday, February 22, 2008
Tischdecke Afghan Complete!

My first instinct, after I had finished the final stitch of this lovely piece, was to frog it so I could have the pleasure of knitting it again. The engaging design and the exquisite yarn melded into an incomparable knitting experience.
The design, which is on page 12 of Andrea #801 (you can buy it here), is lyrical, lacking a single boring or tedious stitch. Lisa Souza's inspired Mother of Pearl colorway added a subtle twinkle to the already soft and lustrous yarn--Petal--a 50% wool, 50% silk blend. I believe that Petal is actually Carrera aka Silk and Ivory from Henry's Attic--I have some of that and they seem to be the same thing.
This is the only design that I ever seriously considering knitting a second time, perhaps with cashmere silk.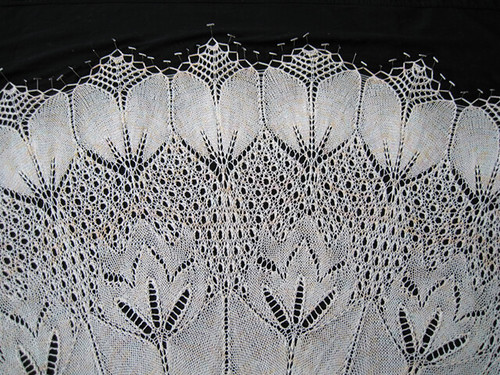
The final size--74" in diameter--makes for a cozy and luxurious afghan. Roy was using it before I even blocked it. This version required about 2800 yards and was knit on a #5 needle.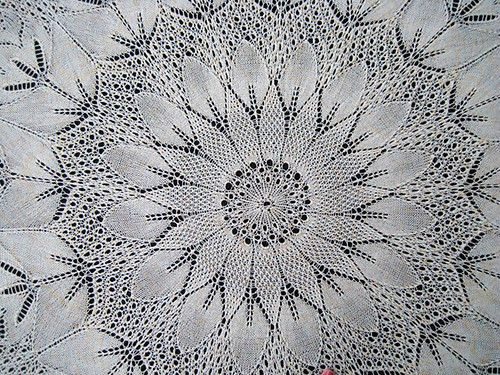
It's difficult to see the exquisite coloration, but if you click on the picture below, you will be able to discern the pastel loveliness that Lisa gave this yarn.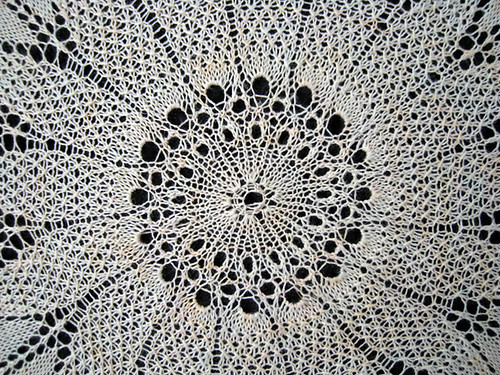
Sunday, February 17, 2008
Introducing Normality
Those of you who know me well (or even casually, I guess) would probably never put "fleegle" and "normality" in the same sentence unless there's a negative conjunction lurking somewhere between the two words.
Rest assured--I haven't misplaced my eccentricity, I am just talking about a different normality than, um, normal, that is, the geometric one:
normal. normals are lines that run perpendicular to a plane.
Wait! Don't go away! Normality is really a inspiring concept when applied to knitted objects. After fooling around with geometric normality for a day or two, I invented a seamless sideways sweater and a completely new shawl construction that begins in the center and works outward to the two ends.
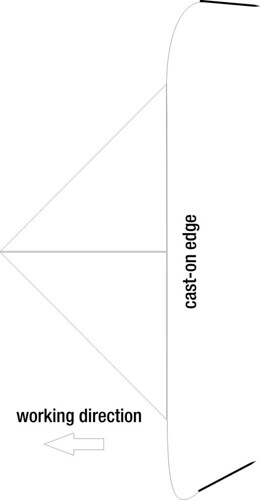
The shawl begins with a provisional Turkish cast on. Each side is knitted by beginning in the center--the widest point--and decreasing at one edge until there are no stitches remaining. I illustrate the construction of the first and second half below. The top picture shows the first half being worked to the left. The shawl is then turned around, and the waiting provisional stitches are just knitted in the same way.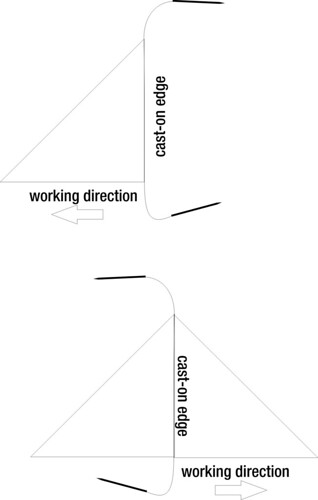
This construction has many intriguing and convenient aspects.
- The border is knitted at the same time as the shawl body, so there is never a need to pick up any stitches and knit on an interminable border.
- The shape is easily altered by changing the decrease rate. A faster rate of decrease produced a narrower shawl; a slower rate a wider one.
- The size is easily changed by adjusting the number of pattern repeats.
- If you have a knitting book with 300 patterns, it now contains 600 patterns, because normality shawls show patterns sideways. And trust me, you will be amazed at how lovely and unusual many patterns appear when you view them from a 90-degree angle.
- You start at the widest point and your progression leads to fewer and fewer stitches on the needle. As you become sicker and tireder of the pattern, you will whiz through the rows faster and faster.
- The construction allows for interesting top borders, a part of shawl anatomy that is usually neglected.
- It's simple to make a little swatch with two or three repeats and see how the pattern looks. The micro-shawl is cute and can be used to wrap a chilly teddy bear.
I have knitted a prototype mini-sweater and started two normality shawls--one simple, and one-complex. I promise to bore you to tears with the designs in a later post. For now, you can study how I constructed a normality Shetland.

Monday, February 11, 2008
Tag--I Guess I'm It
Although I've been blogging for more than a year, today was the first time I have been tagged. This particular meme is called Power of 7. Here are the rules:
1. Link to your tagger and post these rules on your blog.
The evil spirit who got me is All Things Shea.
2. Share 7 facts about yourself on your blog, some random, some weird.
1. When I was 9 years old, I was running into a shop in Copenhagen and crashed into Winston Churchill, causing him to drop an armload of packages.
2. I once sat next to a handsome guy named Oscar at a scuba resort in Roatan. When I asked him what he did for a living, he told me he was the President of Costa Rica. "Yeah," I replied, "And I'm the Queen of England." Oscar Arias laughed, fortunately.
3. I don't own a TV, microwave, cell phone, iPod, or wristwatch, but I have eight laptops, a regular standie-uppie PC, four PDAs, and a 600-year old water clock that actually works.
4. I don't need a wristwatch, because I always know what time it is. And I don't need an alarm clock, because I can program myself to wake up at a certain time.
5. My elbow joints can rotate 270 degrees.
6. Jonas Salk was my second cousin.
7. The first sentence I uttered to my future husband compared him to a garbage can.
3. Tag 7 people at the end of your post by leaving their names as well as links to their blogs.
Here are the randomly drawn winners (or losers, depending on your point of view):
4. Let them know they are tagged by leaving a comment on their blog.
Yeah yeah. I'll do that, then duck and run.Wednesday, February 6, 2008
The Doctors Are In!
I am a confirmed lifeline addict (read about them here if you don't know about lifelines). Without lifelines for my fine lace knitting, I am forever dropping stitches, leading to hours of tinking, cursing, screaming, and other behavior unbecoming to a supposed Knitting Expert. Fortunately, all my interchangeable needles come equipped with a perforation, because these types of needles are tightened by sticking a little pin thingy into the hole and twisting with the little rubber whatsis.* Alas, none of my fixed circulars are so equipped.
I had taken a wad of them to our gunsmith so he could remedy this depressing state of affairs, but he has became quite ill and can no longer fulfill my peculiar requests.
My regular readers know what's coming, right? House of Fleegle decided to indulge in some do-it-yourself Knitting Needle Surgery. All we needed was a mini drill press and plenty of micro drill bits, both available cheaply on good old eBay.
Let's take a brief tour of the procedure!
First, let me introduce the surgeon: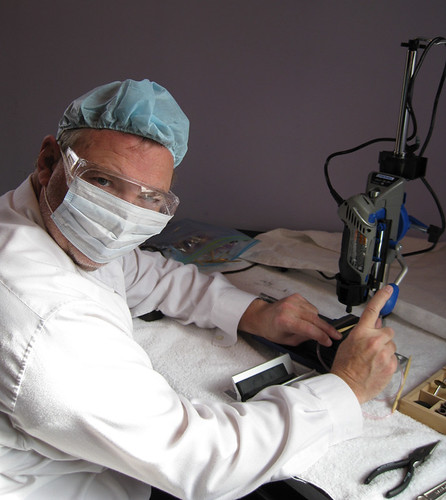
And his multi-talented First Assistant:
Before we started the process, the First Assistant set up the operating room: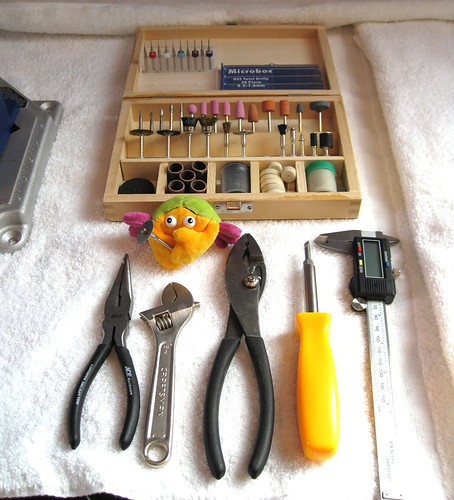
And there's the Second Assistant, Cheeto, holding an entirely unnecessary micro-saw. We'll need that for another procedure though, so it's nice to see him practicing his surgical room instrument clutching.
On to the process.
We first anesthetized the patients by dunking them in our priceless bottle of North Korean Famous Brandy.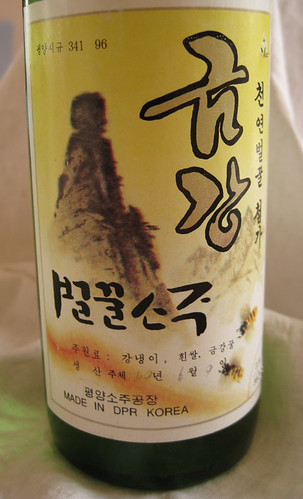
Nice label! The cap is cheerfully designed too:
Ah, Lori, you are correct. Possession of this bottle is most probably entirely illegal, but honestly, we bought it at the DMZ years ago and perhaps the Statute of Limitations has run out on it. It's great anesthetic--the patients remained unconscious through the entire procedure and woke up without drug hangovers. By the way, the brandy is clear, not, ah, brandy-colored. We never actually tasted it.
And here is the surgeon performing the delicate operation:
The patients recuperated rapidly and appreciated Cheeto's little winter bouquet.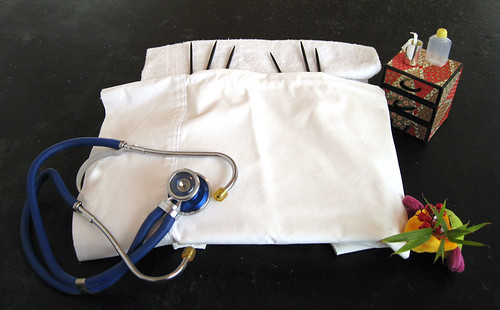
Delicate stomachs might want to close this browser window now. A close-up of the perforation is shown here on Patient Size 1: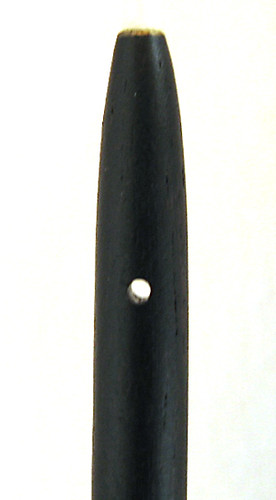
All in all, the operations were successful, but we broke a lot of drill bits on the metal needles. Our next procedure will feature transplant surgery, so be sure to come back if you aren't squeamish!
*Kyoko-san, "whatsis" is a synonym for "thingy." Or "thingie." I cannot construct a legal plural for "whatsis," although "whatsises" or "whatses" might work.
Friday, February 1, 2008
A Little Something to Brighten Your Day
My neighbor sent me this link--go and laugh a little here.
Thanks, Nancy!
